
Inviting members
Add someone to your organization and set their role, access, and details up front.
You bring your team into BadgeOut from one place, and the details you set as you invite someone follow them in. Their role, the contracts they're on, and their leave banks are all ready the moment they accept.
Open the invite form
- Open Settings, then select Members.
- Select Invite Members.
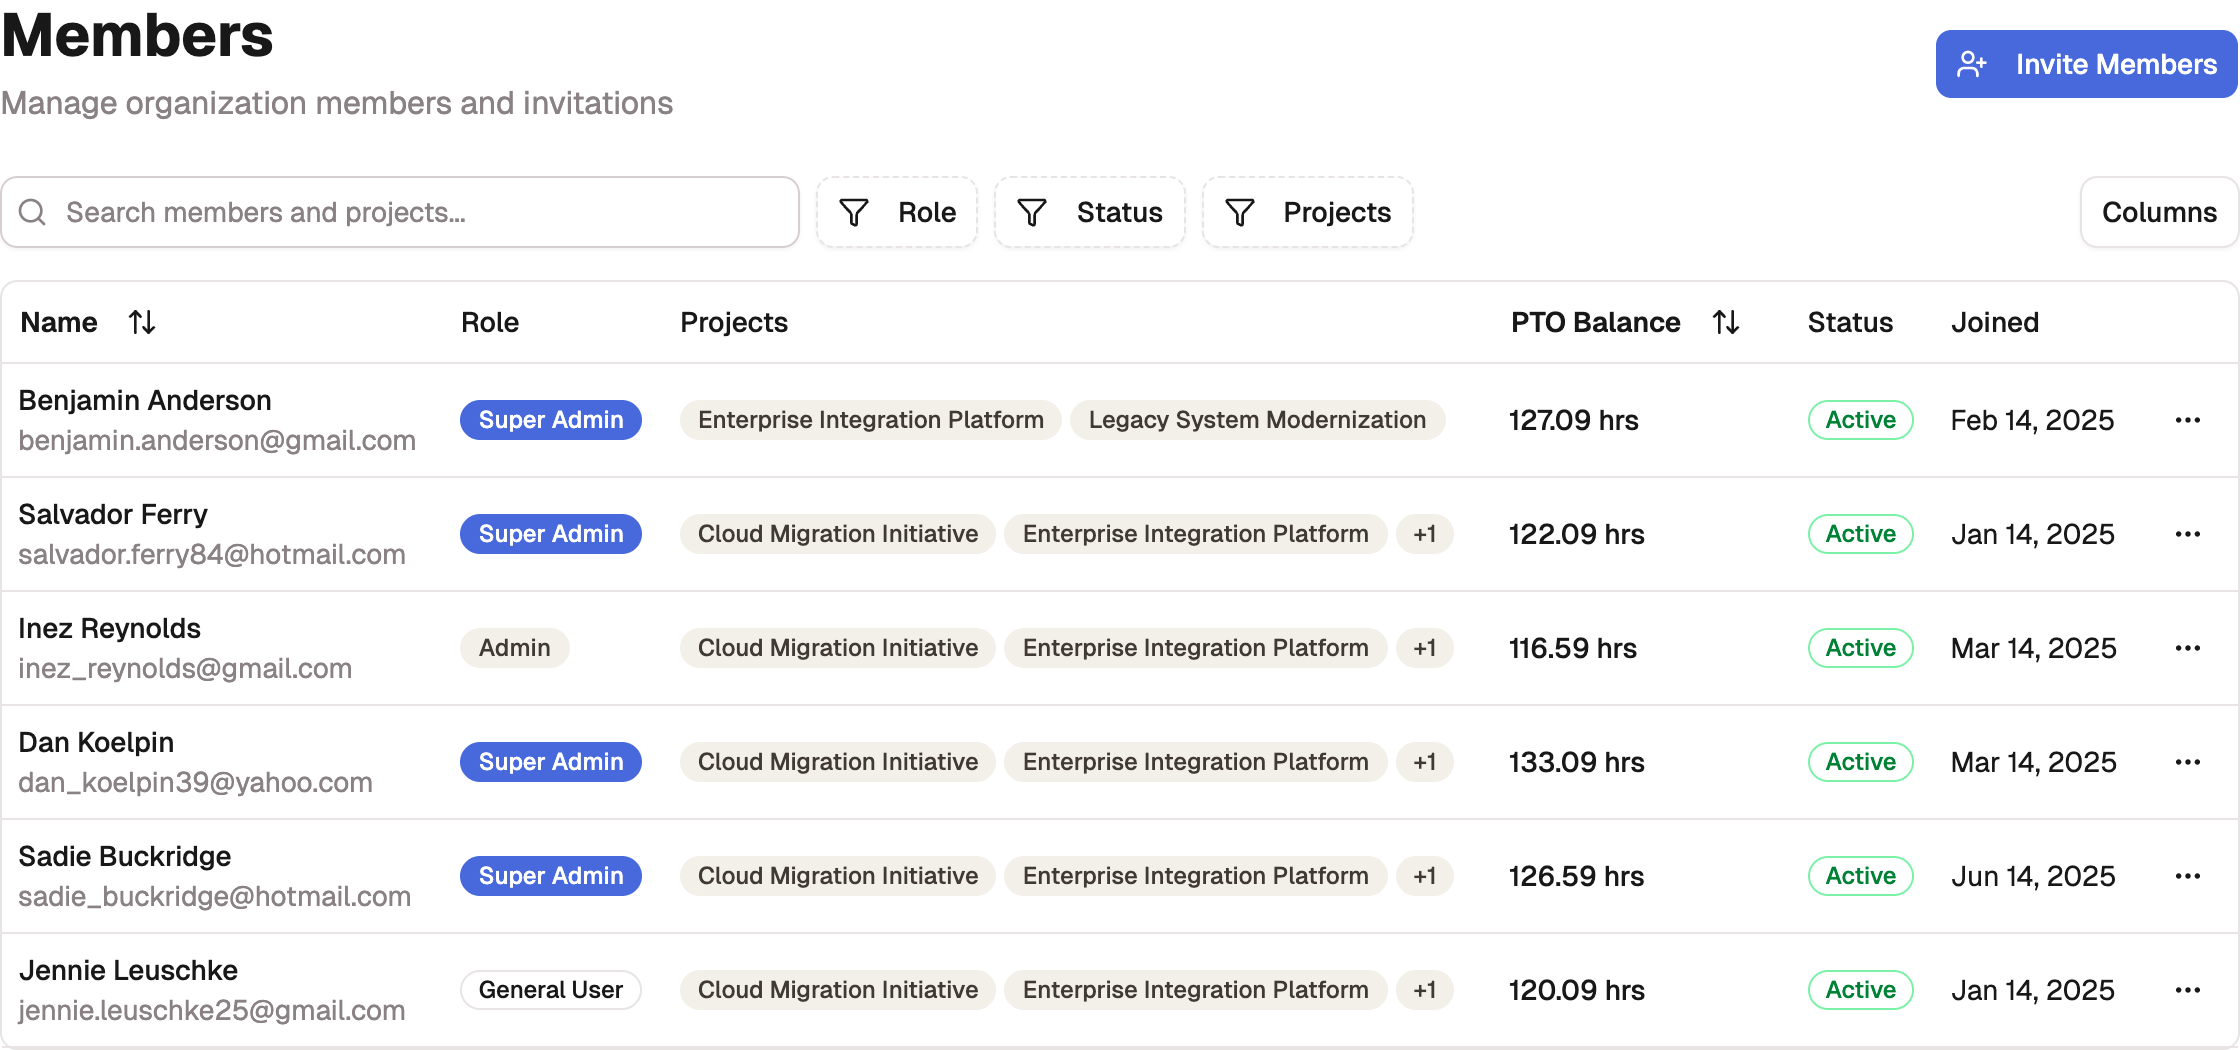
The Members page lists everyone in your organization alongside invitations that haven't been accepted, so you can see who's active and who's still pending.
Invite a member
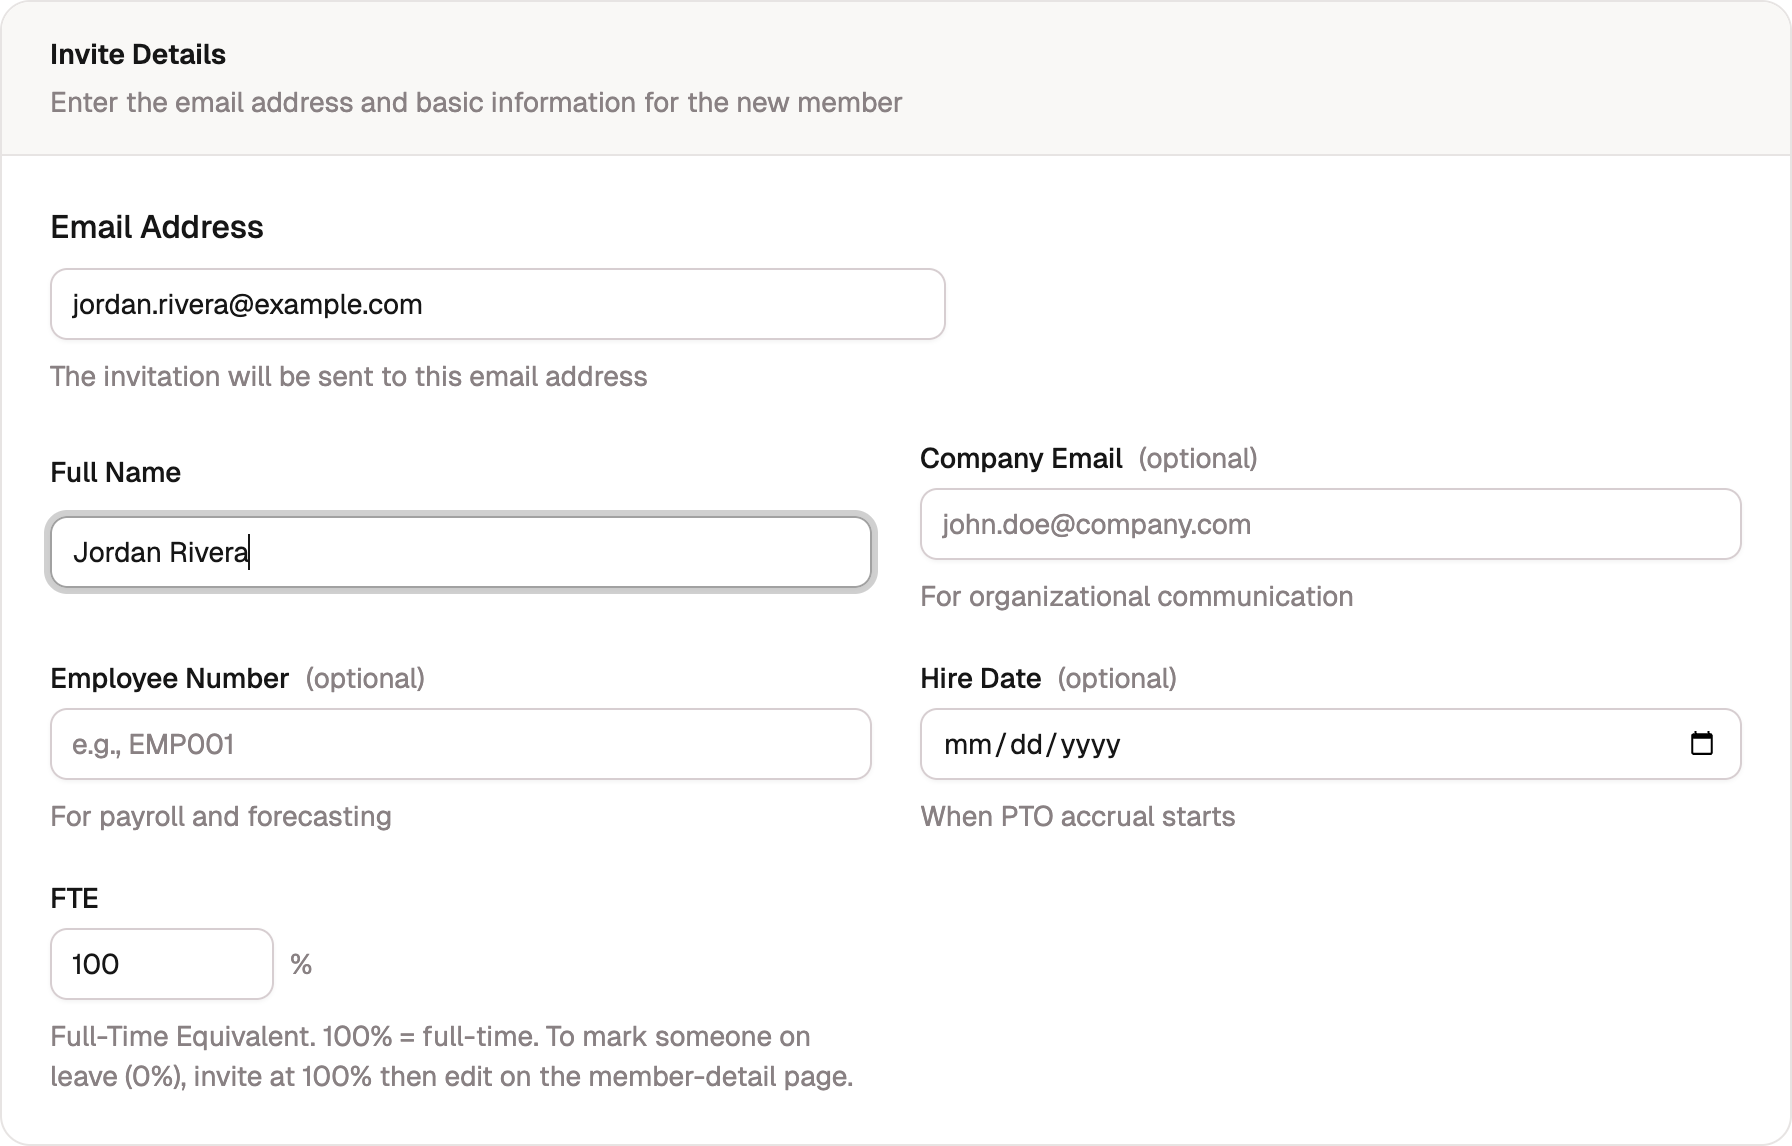
The invite form opens on the Single Member tab. Fill it in for the person you're adding:
- Enter their Email Address. The invitation goes here, and it's the address they'll sign in with.
- Enter their First Name and Last Name. These prefill the account they create on acceptance, and exports can render them either way around (see the Name format option in Table reports).
- Optionally add a Company Email and Employee Number for your own records and payroll. The number shows as Employee ID everywhere else: on the members list, the member's page, timesheet exports, and as a report dimension. It must be unique among your active members; entering one already in use is refused with a message naming the conflict. A former member's number can be reused for a rehire.
- Optionally choose a Hire Date. This sets when PTO accrual starts, so it's worth getting right for new hires.
- Set their FTE. Leave it at 100% for full-time. To bring someone on at 0% (on leave), invite them at 100% and adjust it on their member page afterward.
Set their role and access
The same form sets what the new member can do and what they work on.
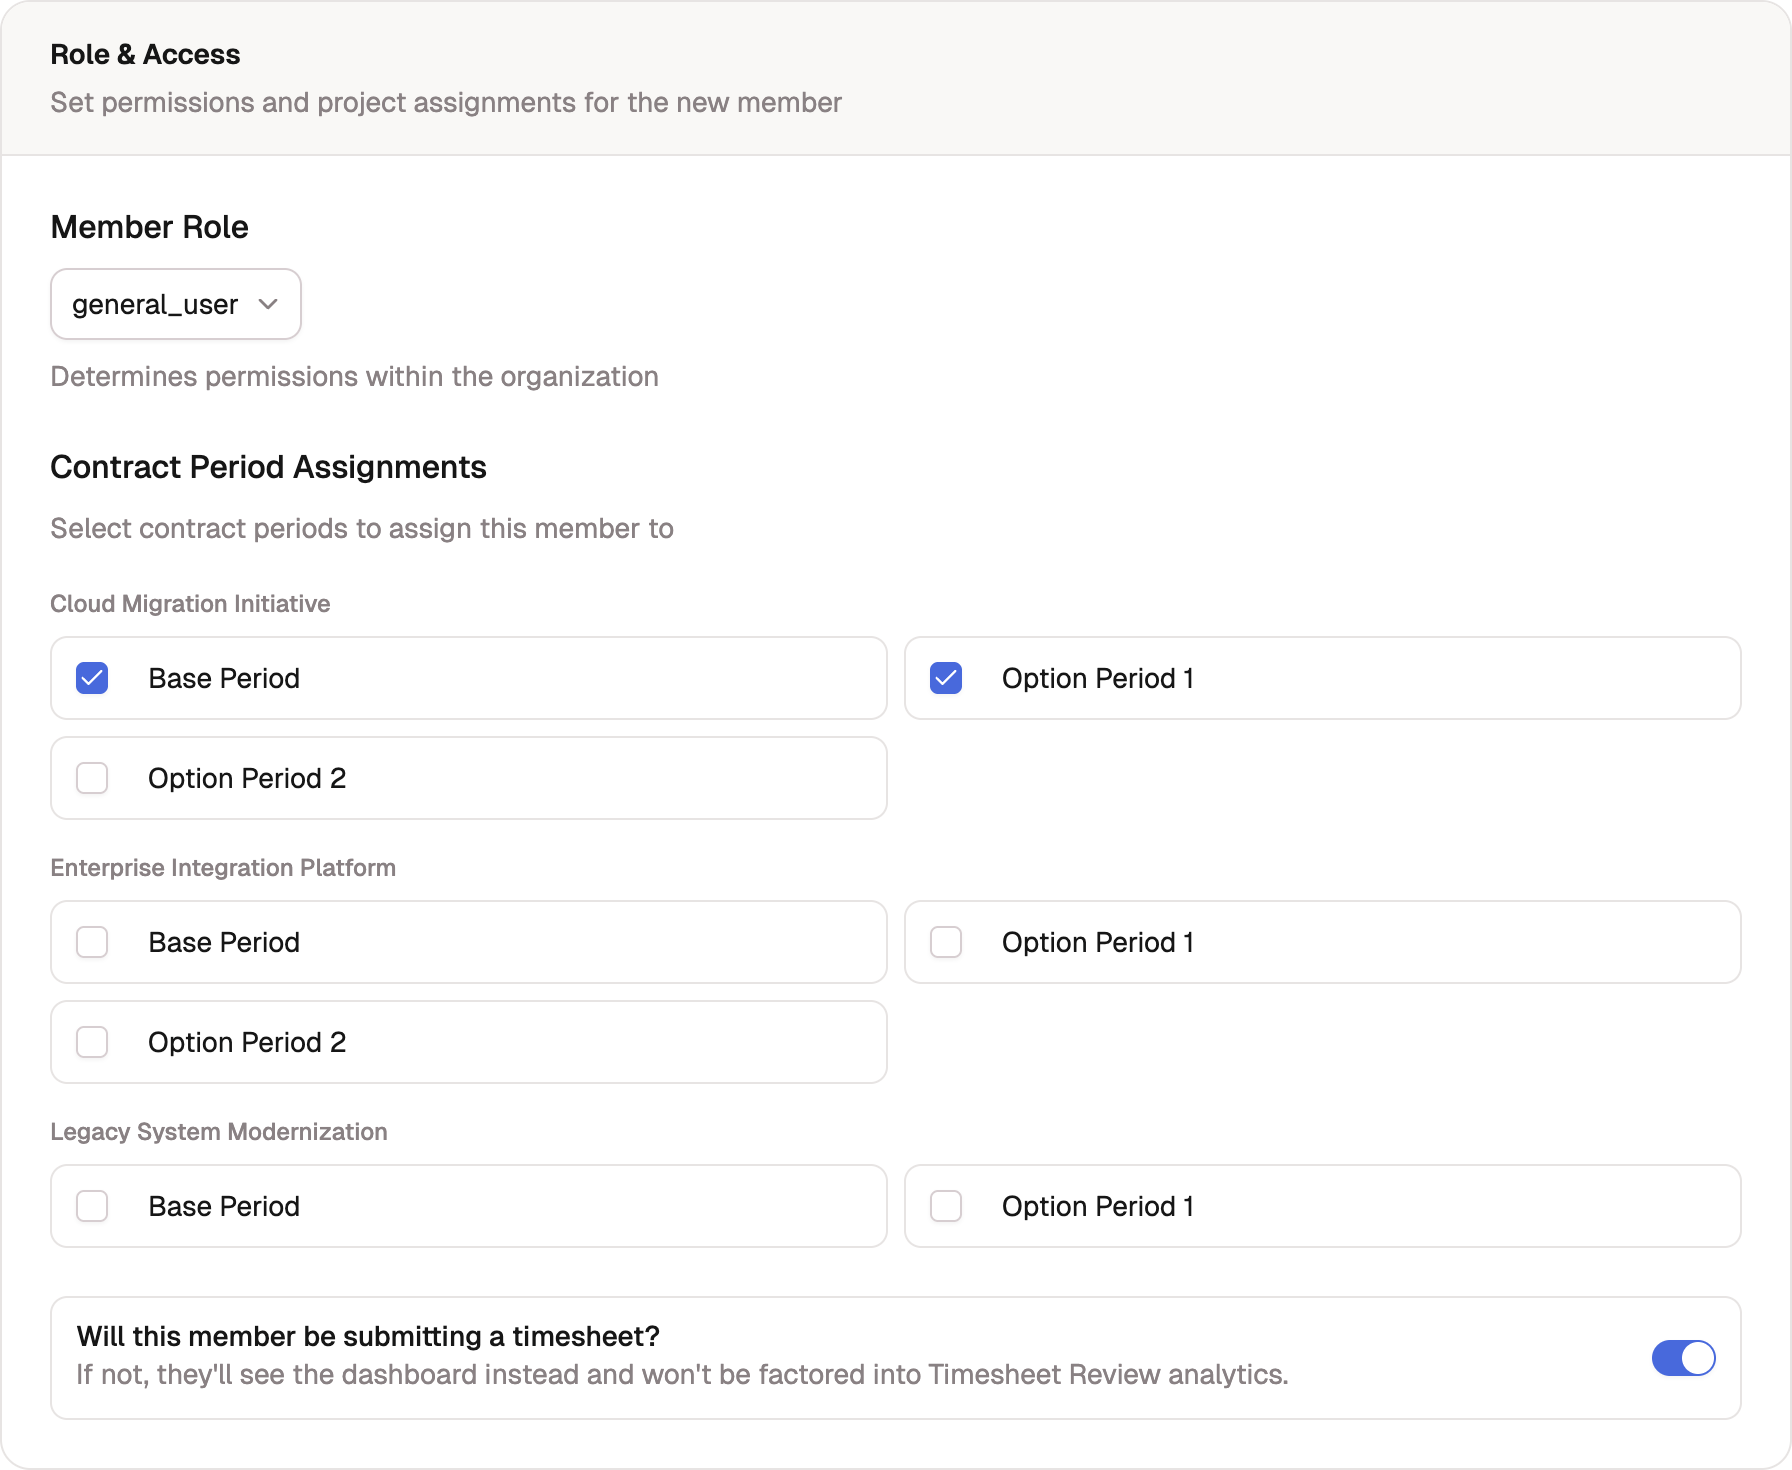
- Choose a Member Role: General User, Reviewer, Manager, Admin, or Super Admin. These are the roles described in Roles and permissions, so pick the one whose access matches what the person needs.
- Select any Contract Period Assignments to put them on the right contracts from day one. These are charge code assignments on a contract period; for the full picture, see Assigning members.
- Leave Will this member be submitting a timesheet? on for anyone who logs hours. Turn it off for someone who only needs the dashboard; they won't appear in Timesheet Review analytics.
Choose their leave banks
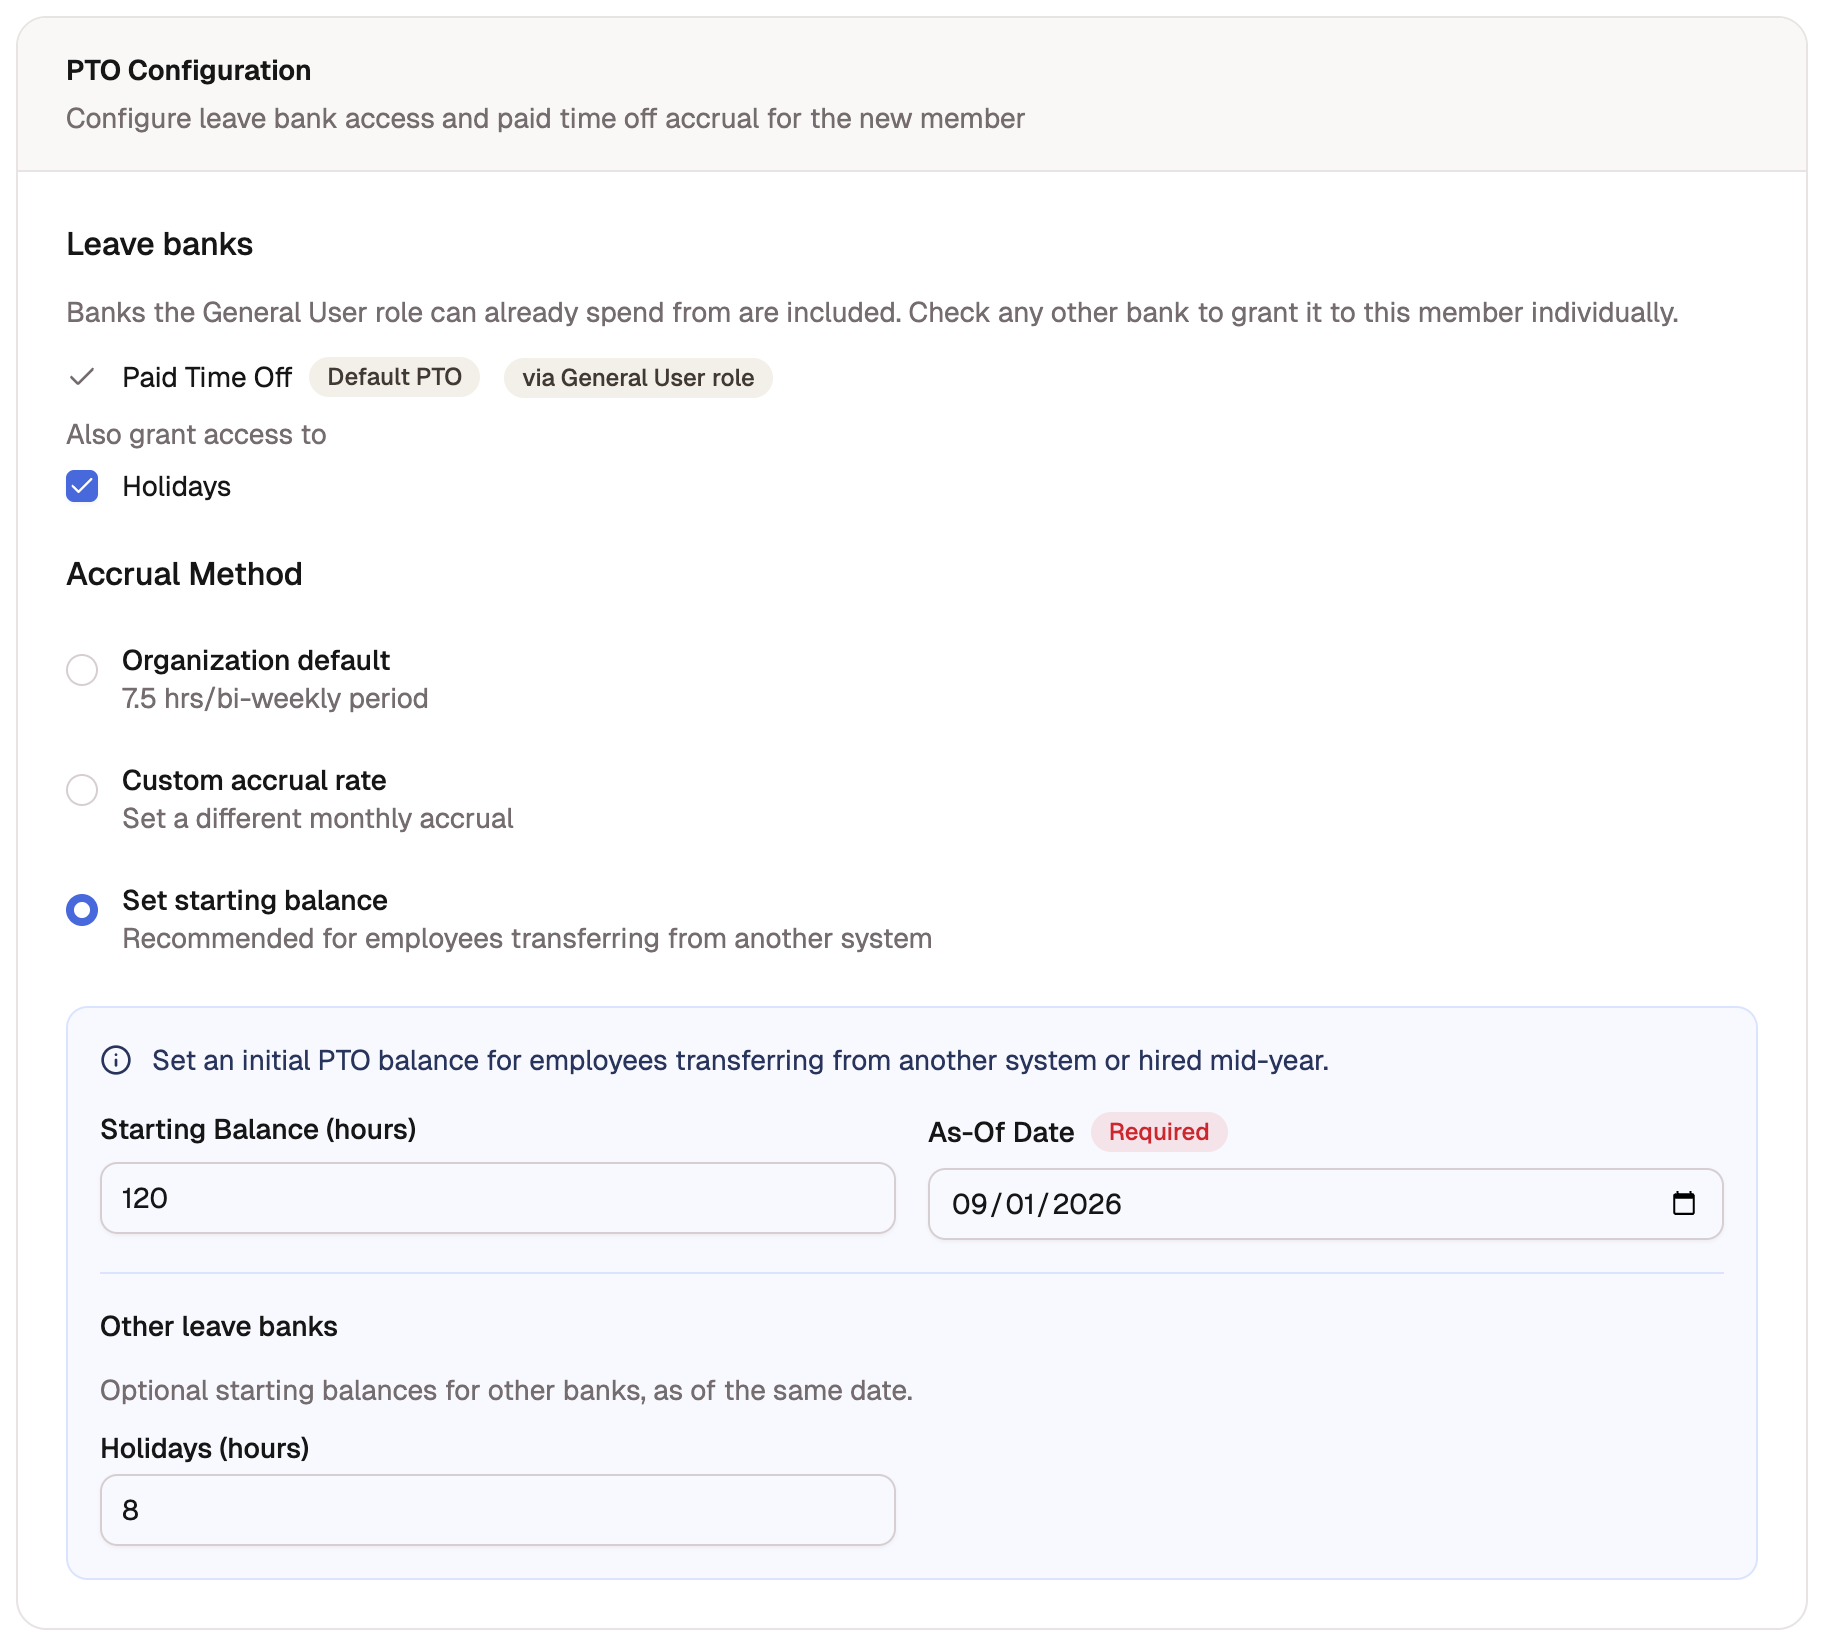
The PTO Configuration section decides which leave banks the person can spend from on day one. Its Leave banks checklist reads from the role you chose:
- Banks the role can already spend from are included automatically, each marked via … role. They can't be unchecked here; that access follows the role, and changes on the Permissions page.
- Any other bank appears under Also grant access to. Checking one grants it to this member individually, on top of their role.
Leave the checklist untouched and the member simply lands with their role's banks, which is the right call for most invites.
Choosing Set starting balance as the accrual option opens the balance fields: Starting Balance (hours) and a required As-Of Date for the default PTO bank, plus an Other leave banks input for each extra bank you checked, all anchored to the same date. A balance can only go to a granted bank, so unchecking the default PTO bank disables its balance field.
Tip
Starting balances and accrual rates are part of pre-provisioning a member, covered in Pre-provisioning and deferred invites. Both take decimal hours, so a balance carried in from another system transfers exactly.
Send the invitation
Select Send Invitation. The member is created with a status of Pending, and BadgeOut emails them an invitation link. The link expires after 14 days. On the Plus plan you can hold that email and send it later, in which case the button reads Create Member instead. See Pre-provisioning and deferred invites.
A pending invitation isn't a dead end. From the Members page, open the invitation's ⋯ menu to send it again or cancel it if you invited the wrong person.
What your member does
Once the invitation is sent, the rest is on the invitee:
- Your member opens the email and follows the invitation link.
- They sign in with the same provider the invitation was sent to, creating their account if they don't have one.
- They land in your organization with everything you set already in place: their role, contracts, leave banks, and starting balances.
Inviting one person at a time is the common case. To bring on several at once, use the Bulk Entry tab for a pasted list or the CSV Import tab for a spreadsheet.
CSV import columns
The CSV Import tab accepts these columns; download the template from the tab for a ready-made file with sample rows.
| Column | Notes |
|---|---|
email | Required. Where the invitation goes; the sign-in address. |
first_name, last_name | Required (together they form the name). Older files with a single name column still import; when both are present, the name parts win. |
role | general_user, reviewer, manager, admin, or super_admin. An unrecognized value imports as General User. |
company_email, employee_number, hire_date, fte_percent | Optional, with the same rules as the single-member form. fte_percent is a whole number (75 for 75%). |
pto_accrual_type, custom_pto_accrual_full_time, pto_balance, pto_balance_as_of | Accrual and starting balance for the default PTO bank; see Pre-provisioning. |
leave_balance:<bank>, leave_balance_as_of:<bank> | Starting balance for another bank, named by the bank's name in caps (leave_balance:HOLIDAY). The template includes a pair per bank. The two columns travel together, and a balance is accepted only for a bank the row's role can spend from. |
charge_code_assignments | Contract assignments as CODE:hours:rate, separated by semicolons. |
timesheet_required | true (default) or false. |
Every row is validated before anything is created. A problem, such as a duplicate email or an Employee ID already in use, is reported against its row and column, so you fix the file rather than untangle a half-finished import.
Imported and bulk-entered members land with their role's leave banks. Granting a bank beyond the role is per person: use the single-member form's checklist, or the member's page after the import.